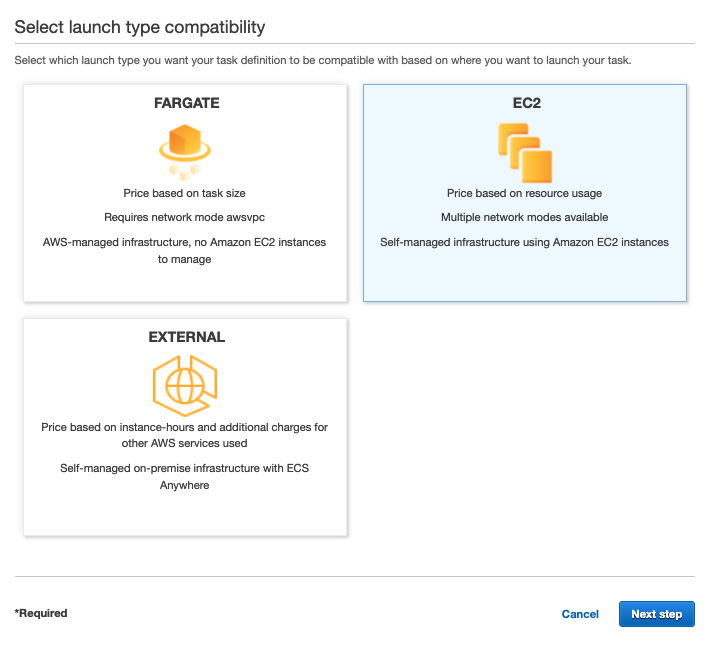
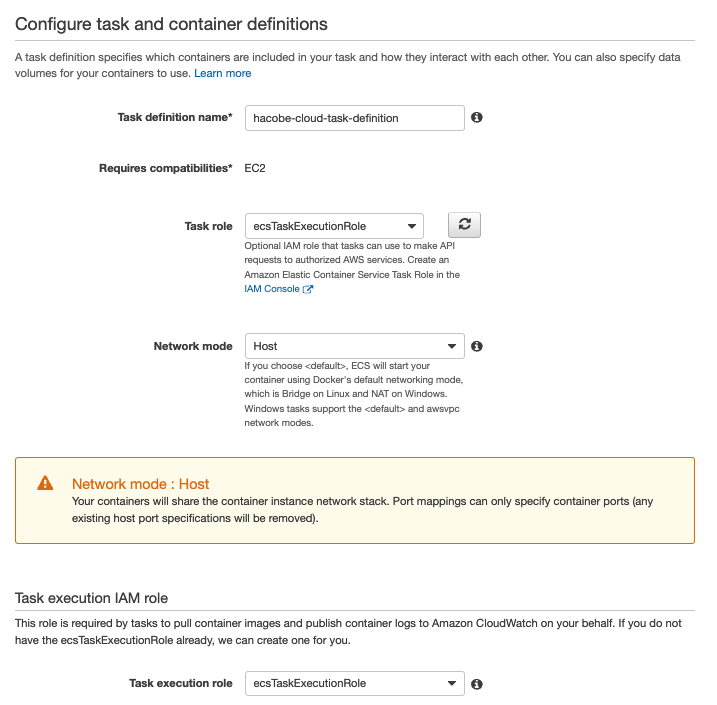
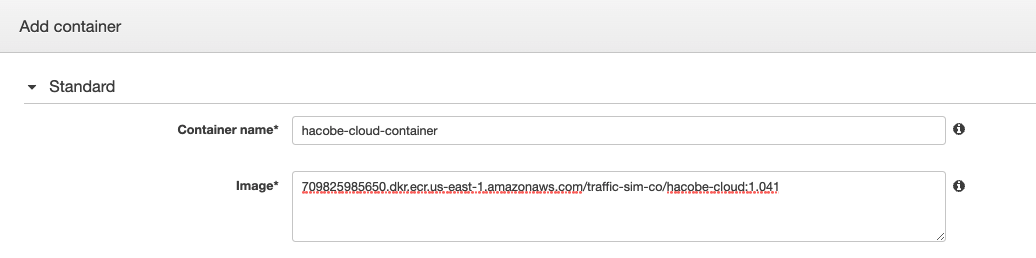
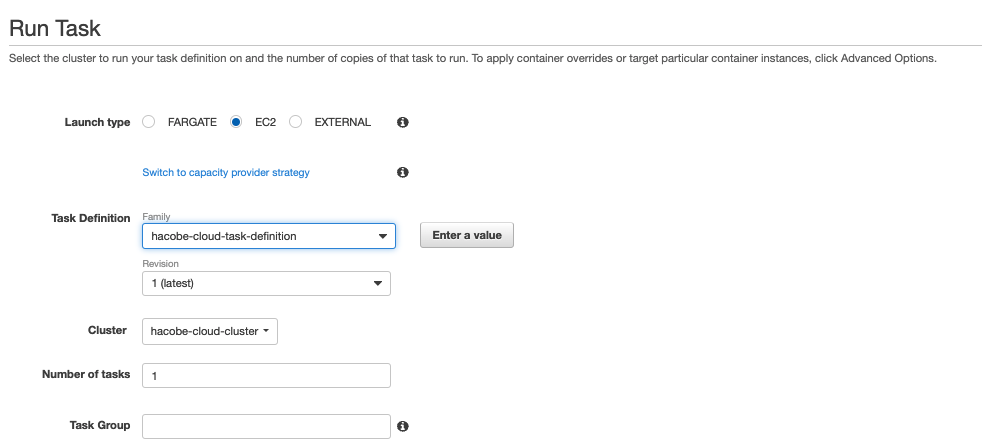
In this document we will tell how to run a HACOBE-CLOUD container on EC2 type on ECS.
-
Open the IAM console.
-
In the navigation pane, choose Roles, Create role.
-
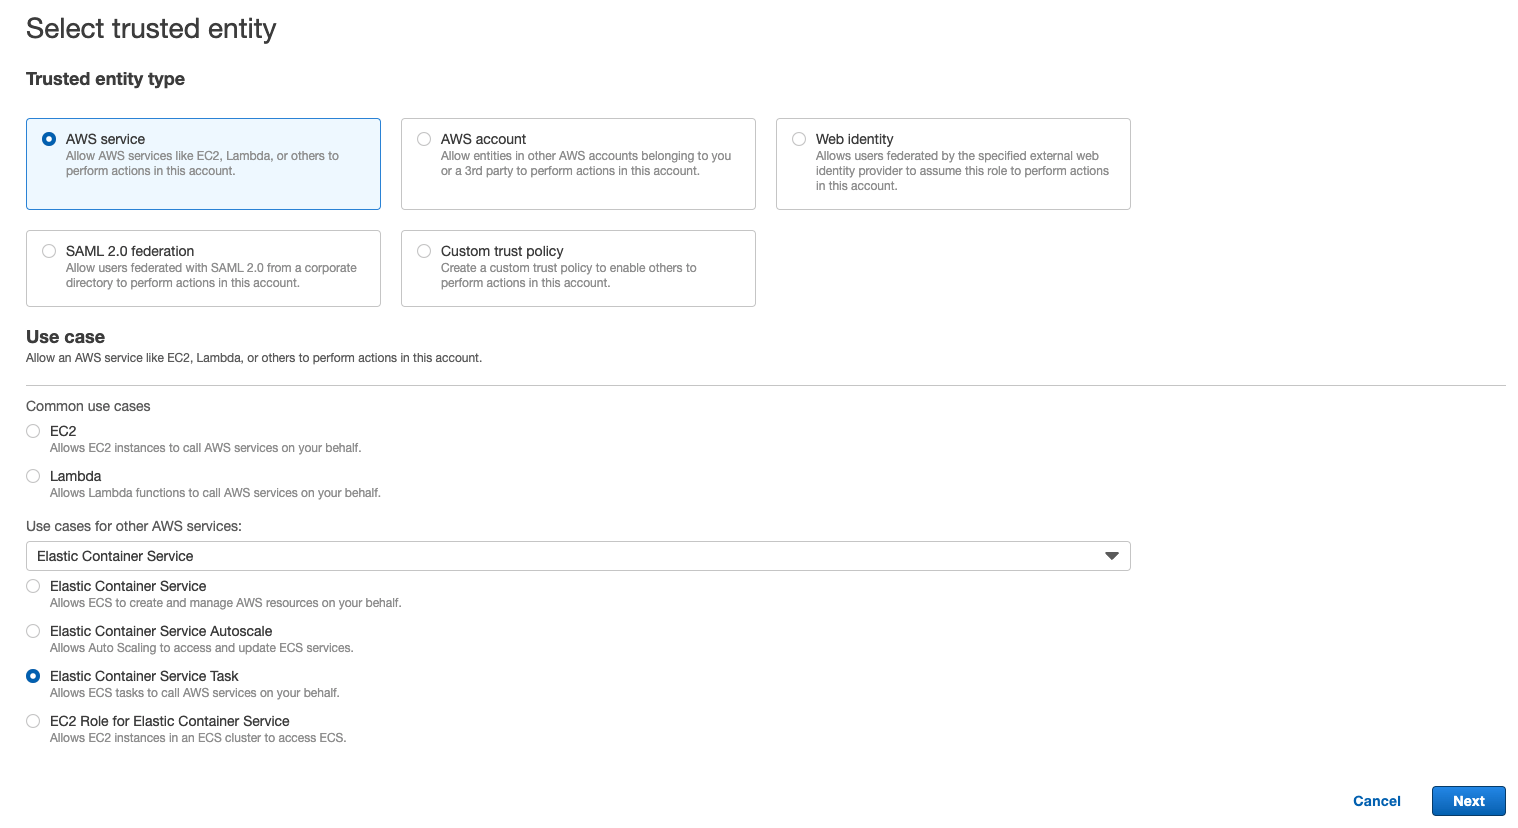
For Select type of trusted entity section, choose AWS service.
For Choose the service that will use this role, choose Elastic Container Service.
For Select your use case, choose Elastic Container Service Task and choose Next.
-
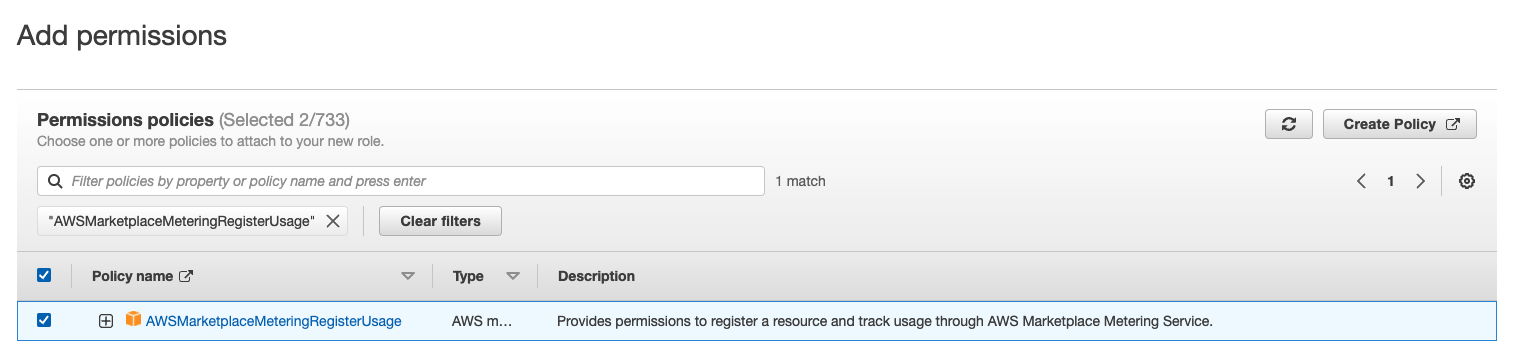
For Attach permissions policy, select the AmazonECSTaskExecutionRolePolicy and AWSMarketplaceMeteringRegisterUsage policies.

-
Add permissions to use the CloudWatch linkage function. This is not necessary if you do not use the CloudWatch linkage function.
- Choose Create policy. A new tab will open.
- Select the JSON tab and enter the following.
HACOBE-CLOUD creates log groups named HACOBE_CLOUD_METRIC and HACOBE_CLOUD_EVENT and sends log events.
Please replace the following two items.
- Region (XX-XXXXXXXX-X): Region where HACOBE-CLOUD is used
- AWS account ID (XXXXXXXXXXXXXXXX): AWS account ID using HACOBE-CLOUD
{
     "Version": "2012-10-17",
     "Statement": [
         {
             "Sid": "VisualEditor0",
             "Effect": "Allow",
             "Action": [
                 "logs:CreateLogStream",
                 "logs:CreateLogGroup",
                 "logs:PutLogEvents"
             ],
             "Resource": [
                 "arn:aws:logs:XX-XXXXXX-X:XXXXXXXXXXXX:log-group:HACOBE_CLOUD_METRIC:*",
                 "arn:aws:logs:XX-XXXXXX-X:XXXXXXXXXXXX:log-group:HACOBE_CLOUD_EVENT:*"
             ]
         }
     ]
 }
- Choose "Next: Tags".
- Choose "Next: Review".
- Enter a name for the policy and choose Create Policy.
- Return to the original tab (Add Permissions for IAM Roles).
- Press the Update button and select the policy you just created.
-
Choose Next.
-
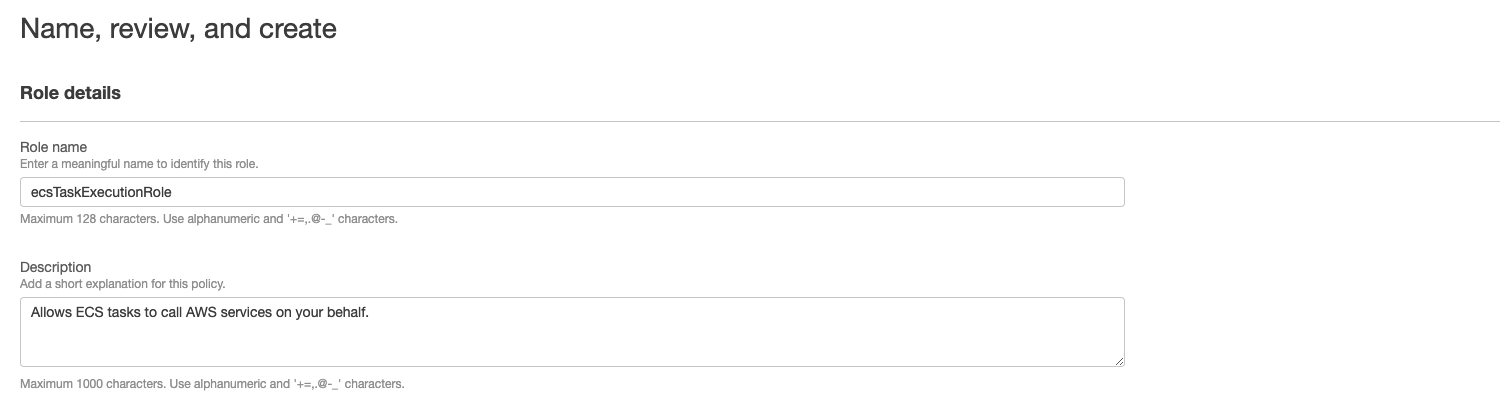
For Role name, enter a name for your role, and then choose Create role.
For the setting of CloudWatch linkage function and the procedure for creating the CloudWatch dashboard template, please refer to the manual from the link below.
CloudWatch Linkage Setting
For other HACOBE-CLOUD functions and usage instructions, please refer to the manual from the link below.
English
Japanese